
Easily Design Your First KDP Low-Content Book
by focusing on your target keyword and more (Post #8 POD)

When I was in the classroom, I dislike "teaching to the test." For my readers unfamiliar to the term, it means you focus on helping your students pass the standardized test. But hear me my co-teachers, there is some value on this method when figuring out how to successfully start your passive income through self-publishing low content books. Let me tell you why: designing with the the end in mind will not overwhelm you and minimize mistakes. It will help you start your passive income via self-publishing simple items. In this post, we will plan the design of our interior pages using the target keyword you chose based on last week’s post and the Amazon listing requirements. For those who are new to this series please review the other posts about this topic listed below.
Open New Income Streams via Amazon's KDP: Introduction to Print-on-Demand and Low-Content Books
Understanding Print-on-Demand Books: From PDF Printouts to a Physical Book
Find Amazon Keywords before Creating your PDF Book Interiors for LCB: How to Find Amazon Keywords
Design with your Target Keyword
We ended our post last week by choosing an Amazon target keyword which is “writing practice for kids.” The phrase simply means a writing tablet or a primary notebook. If you are a primary or SPED teacher, it is likely that you created simple lined paper for your students. That is all it is. Lined paper. Plain lines or the one with a dotted line in the middle. But do not start designing yet. Let’s design with the end product in mind: successful listing of our book based on the listing requirements.
Be Guided with the Listing Requirements
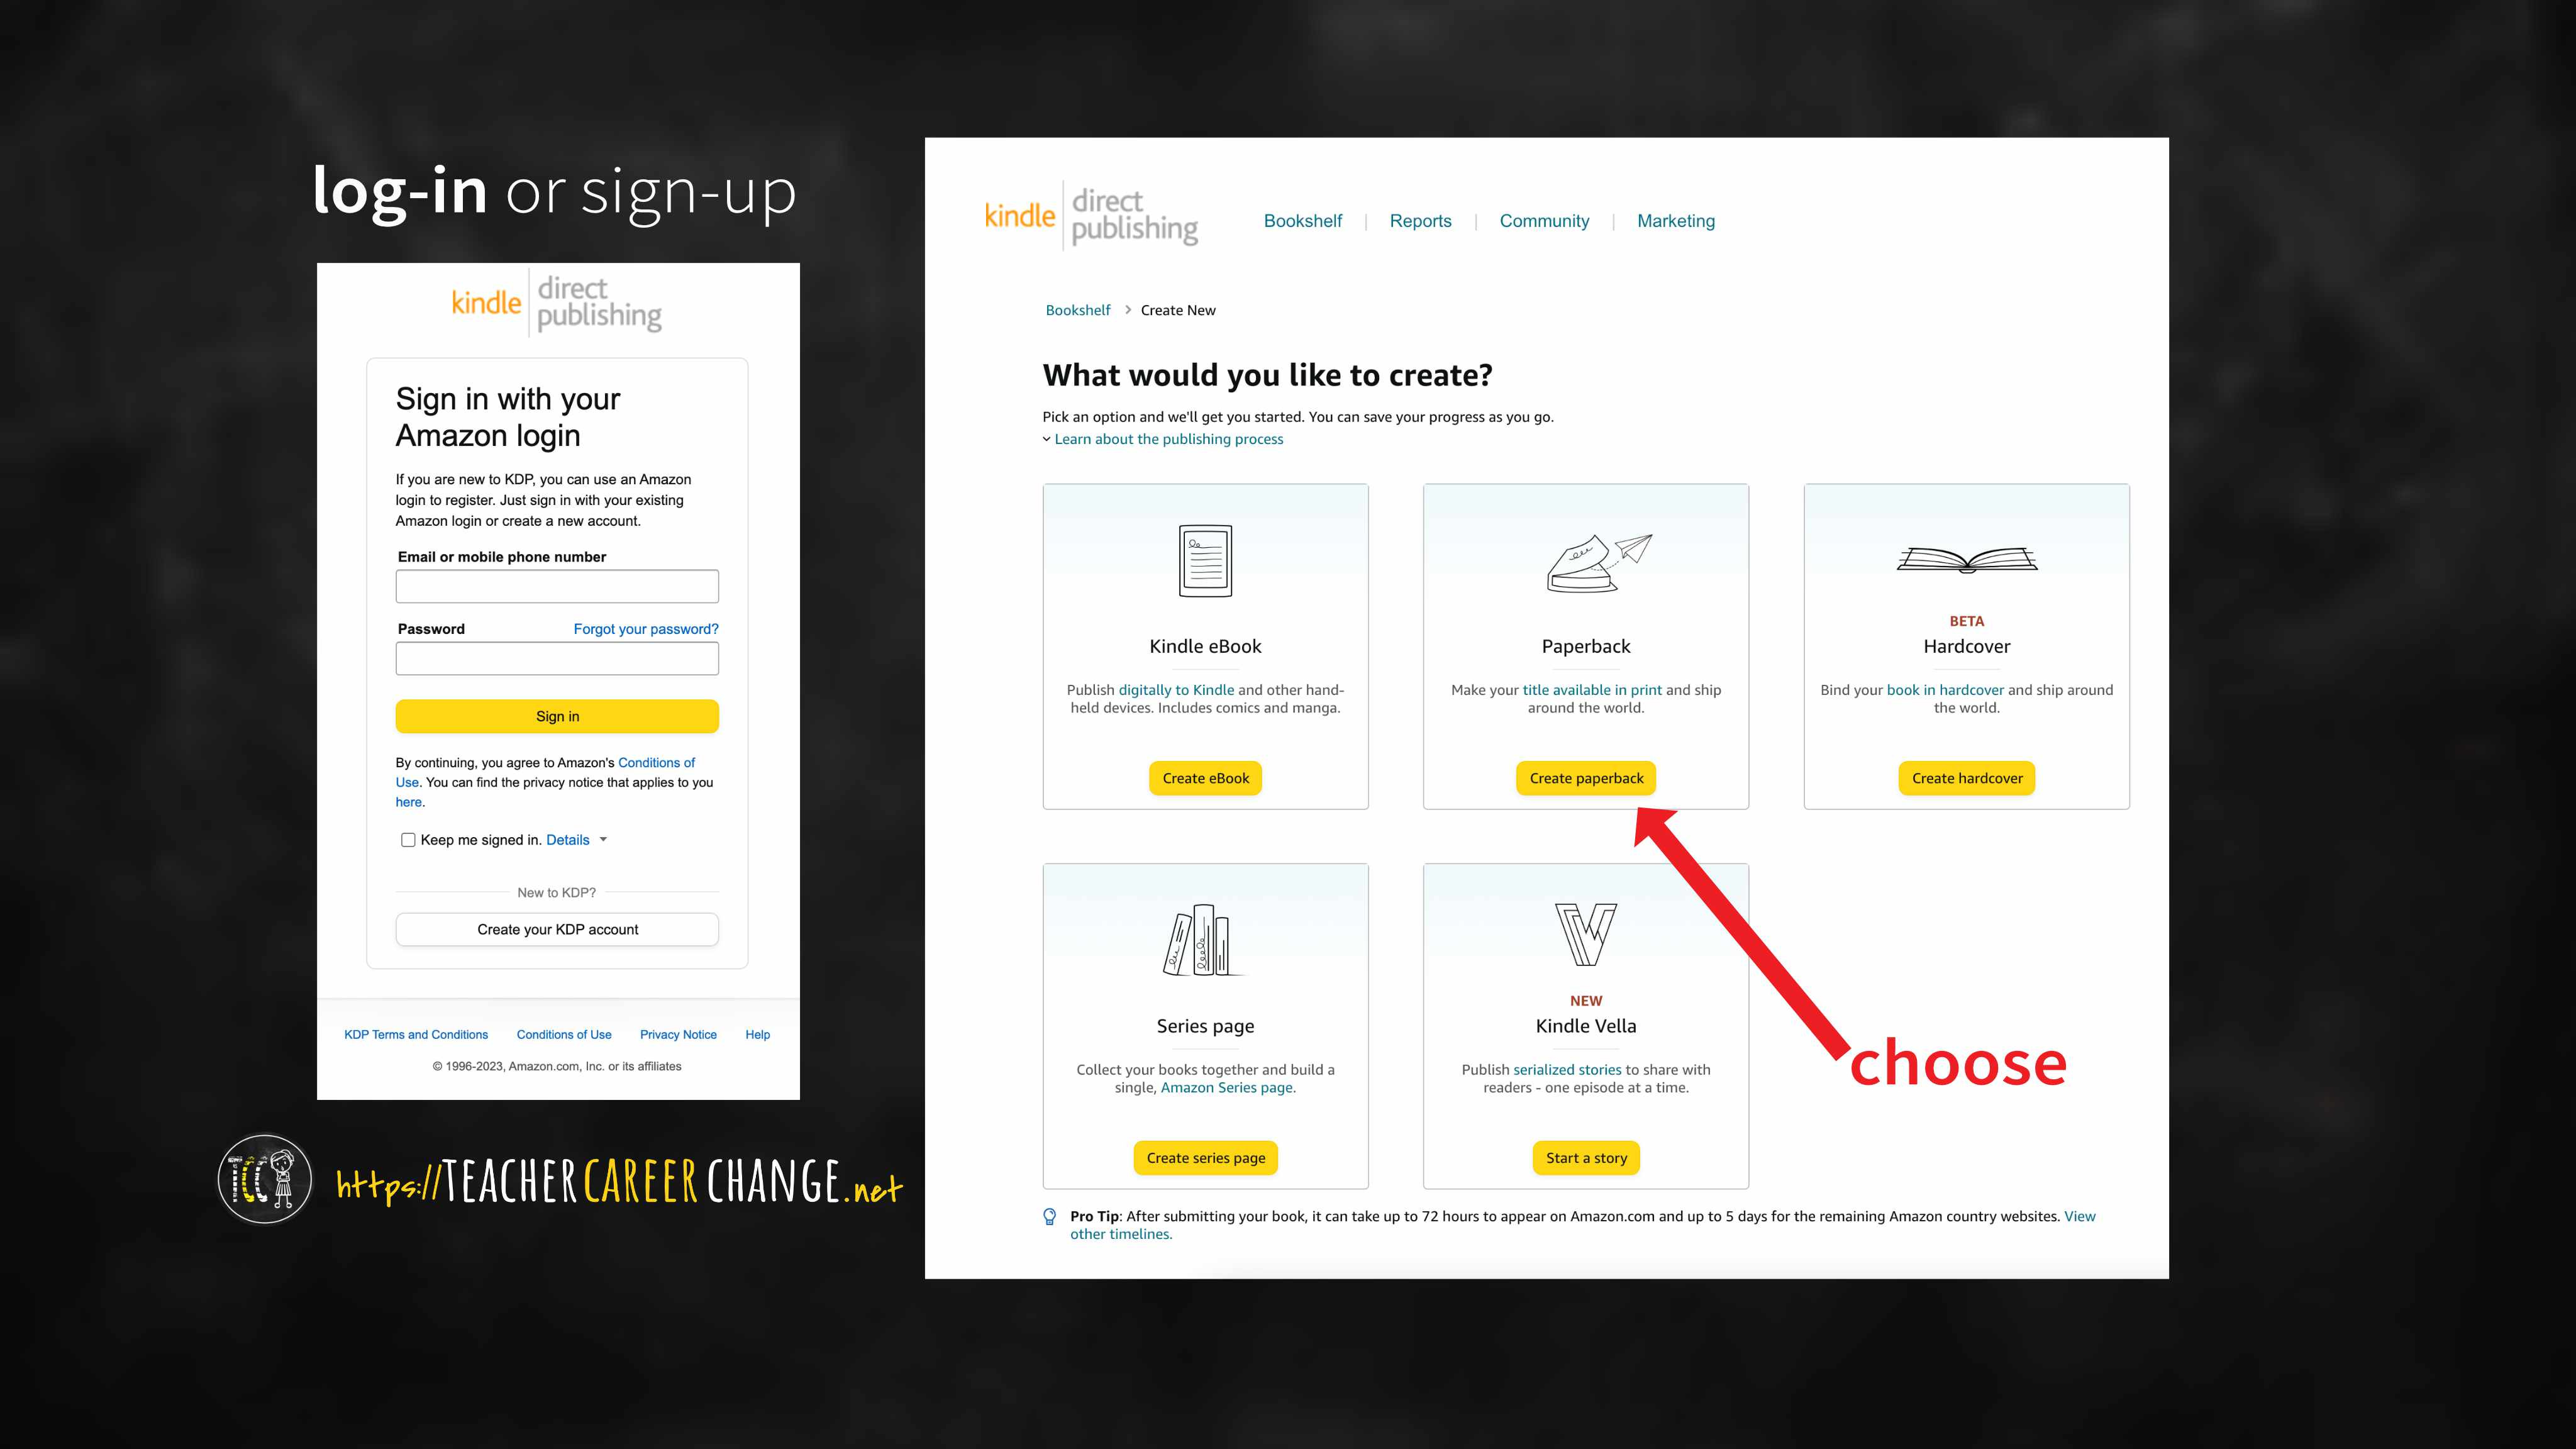
By now, you should have signed-up for a KDP Account, in not, go ahead and create one. If you need help, read KDP’s guidelines on how to set one up. Once you have your account, click on create a paperback; most low-content books are paperbacks. Some can be hardbound. But your first LCB, let’s choose paperback.
Next, you will see three tabs. You will not be able to go to the paperback content or 2nd tab until you put some text on all required spaces. Don’t worry about those text now. We need to focus on items that will affect our design decisions only.
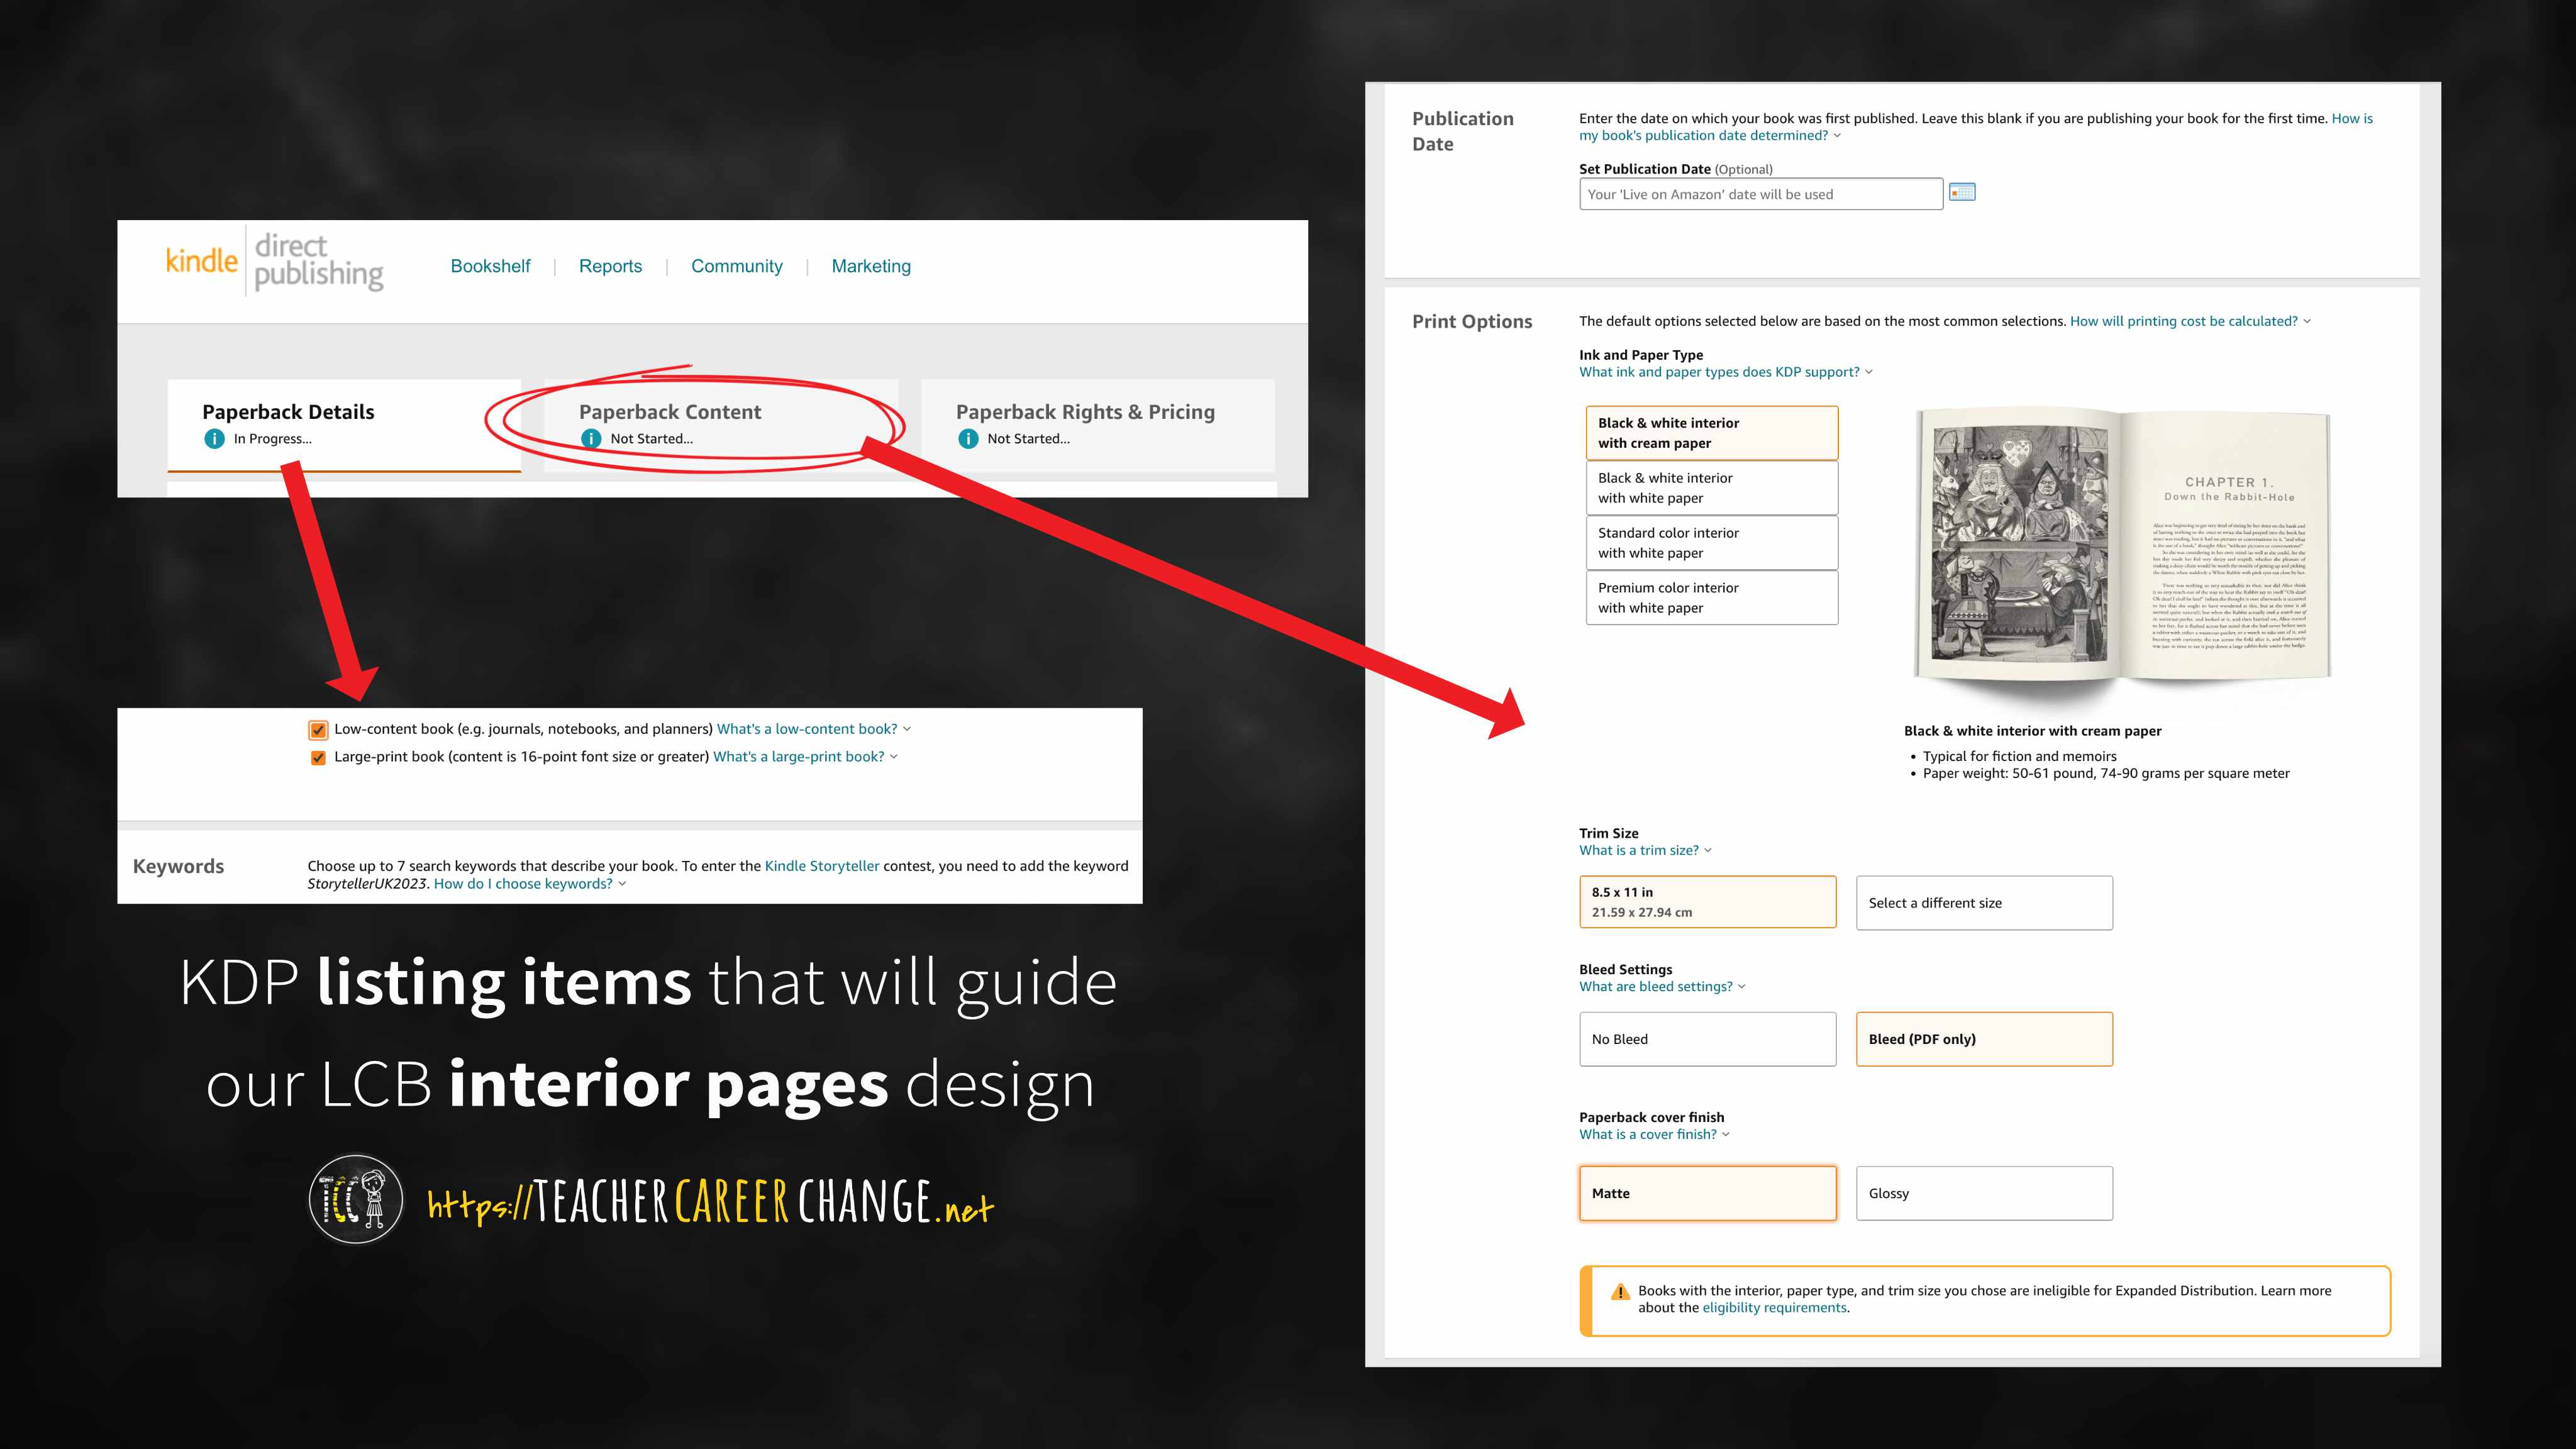
On the 1st tab (Paperback Details) it is important to check the two items shown above. You will see them just above the Keywords. The items are:
low-content book - we are creating a writing practice notebook
large-print book - we will use large fonts which is easier to read by kids
On the second tab, we need to decide our LCB’s size and paper. It is better to pick the largest size which is 8.5 x 11 inches. You can pick another size if you want. We will be choosing “with bleed” which just means some of our graphics can go to the margin edges.
Start Designing
Now you have a guide to start your basic interior page design:
create an 8.5 x 11 Google Slide or Power Point file
create your writing practice lines
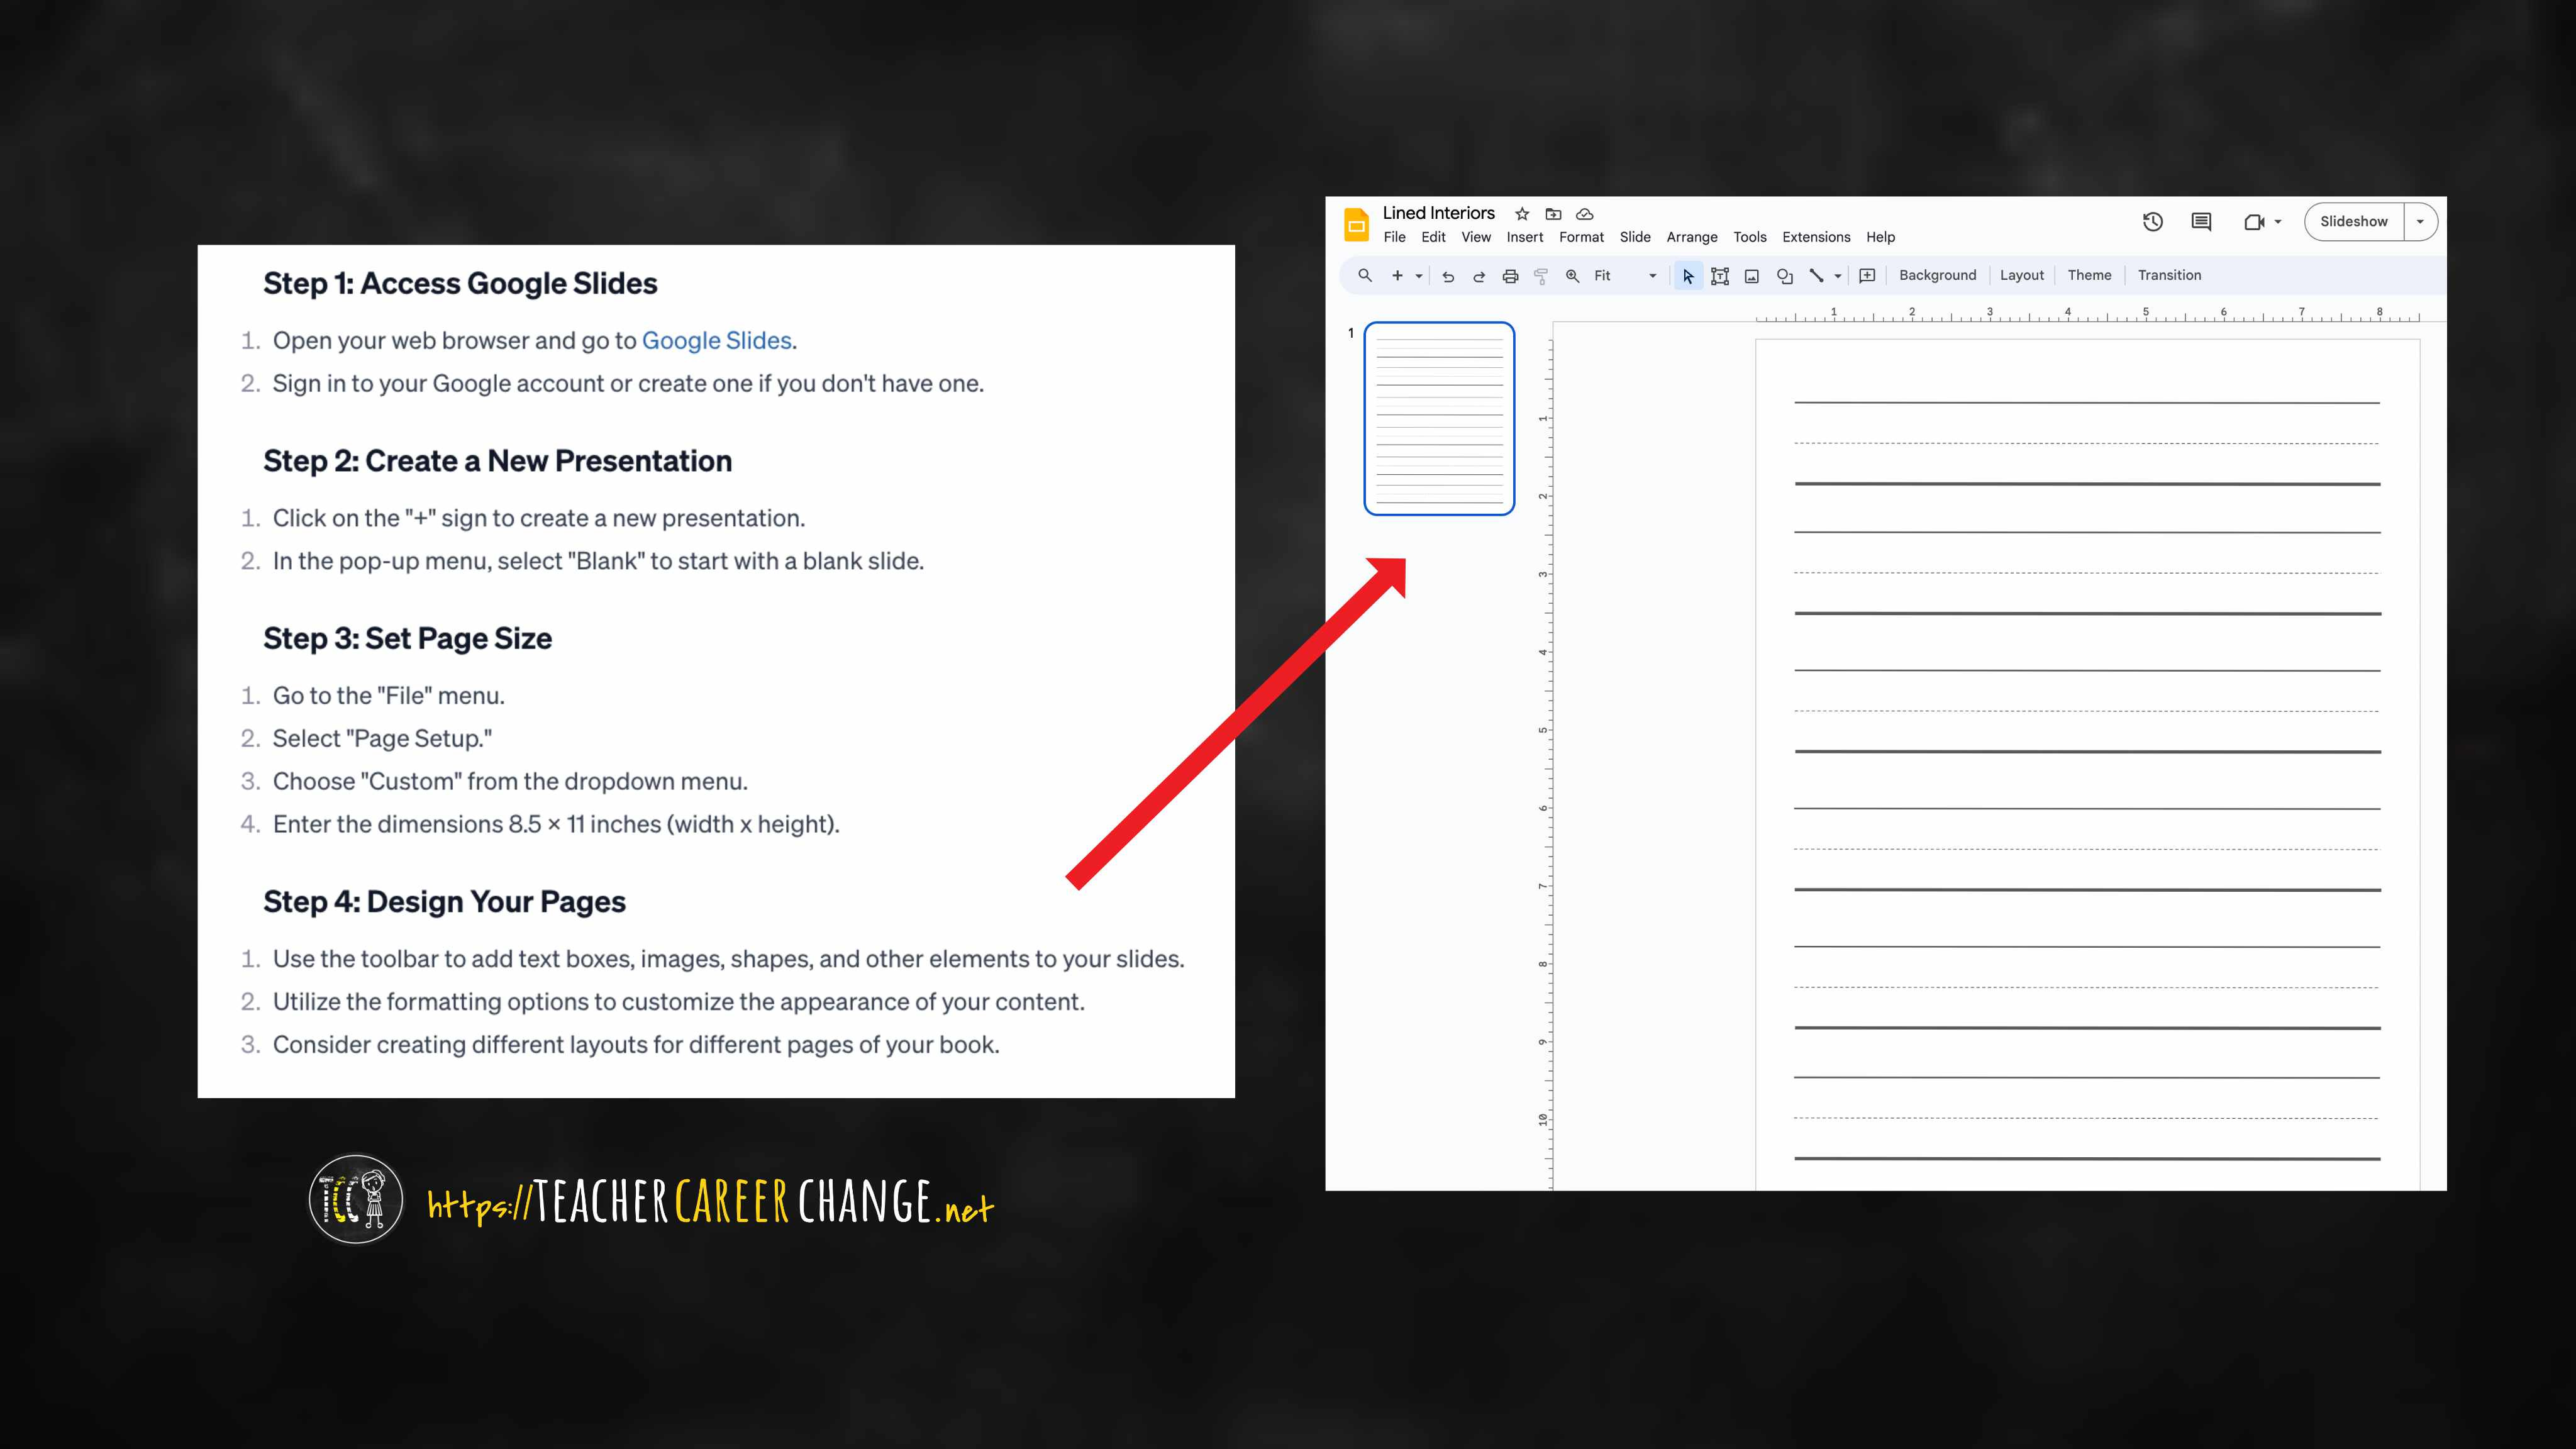
You’ll see how I did it above with a list of steps using Google Slide. I am sure you can design better writing lines than me. Just imagine what your student needs and then make those writing lines. Next week I will show you how to make that single writing page into a 120-page (60 leaves) low-content book.