
How to List your First Low-Content Book without being Frustrated
Breaking down the KDP listing process so you can smoothly list your first POD paperback (Post #11 POD)

How did you help your kids or students finish big projects? I don’t know about you, but I broke them down into smaller tasks. In this post, I will help you break down the Kindle Direct Publishing (KDP) listing process so you’ll be able to list your first low-content book without being overwhelmed or frustrated.
Start from the End
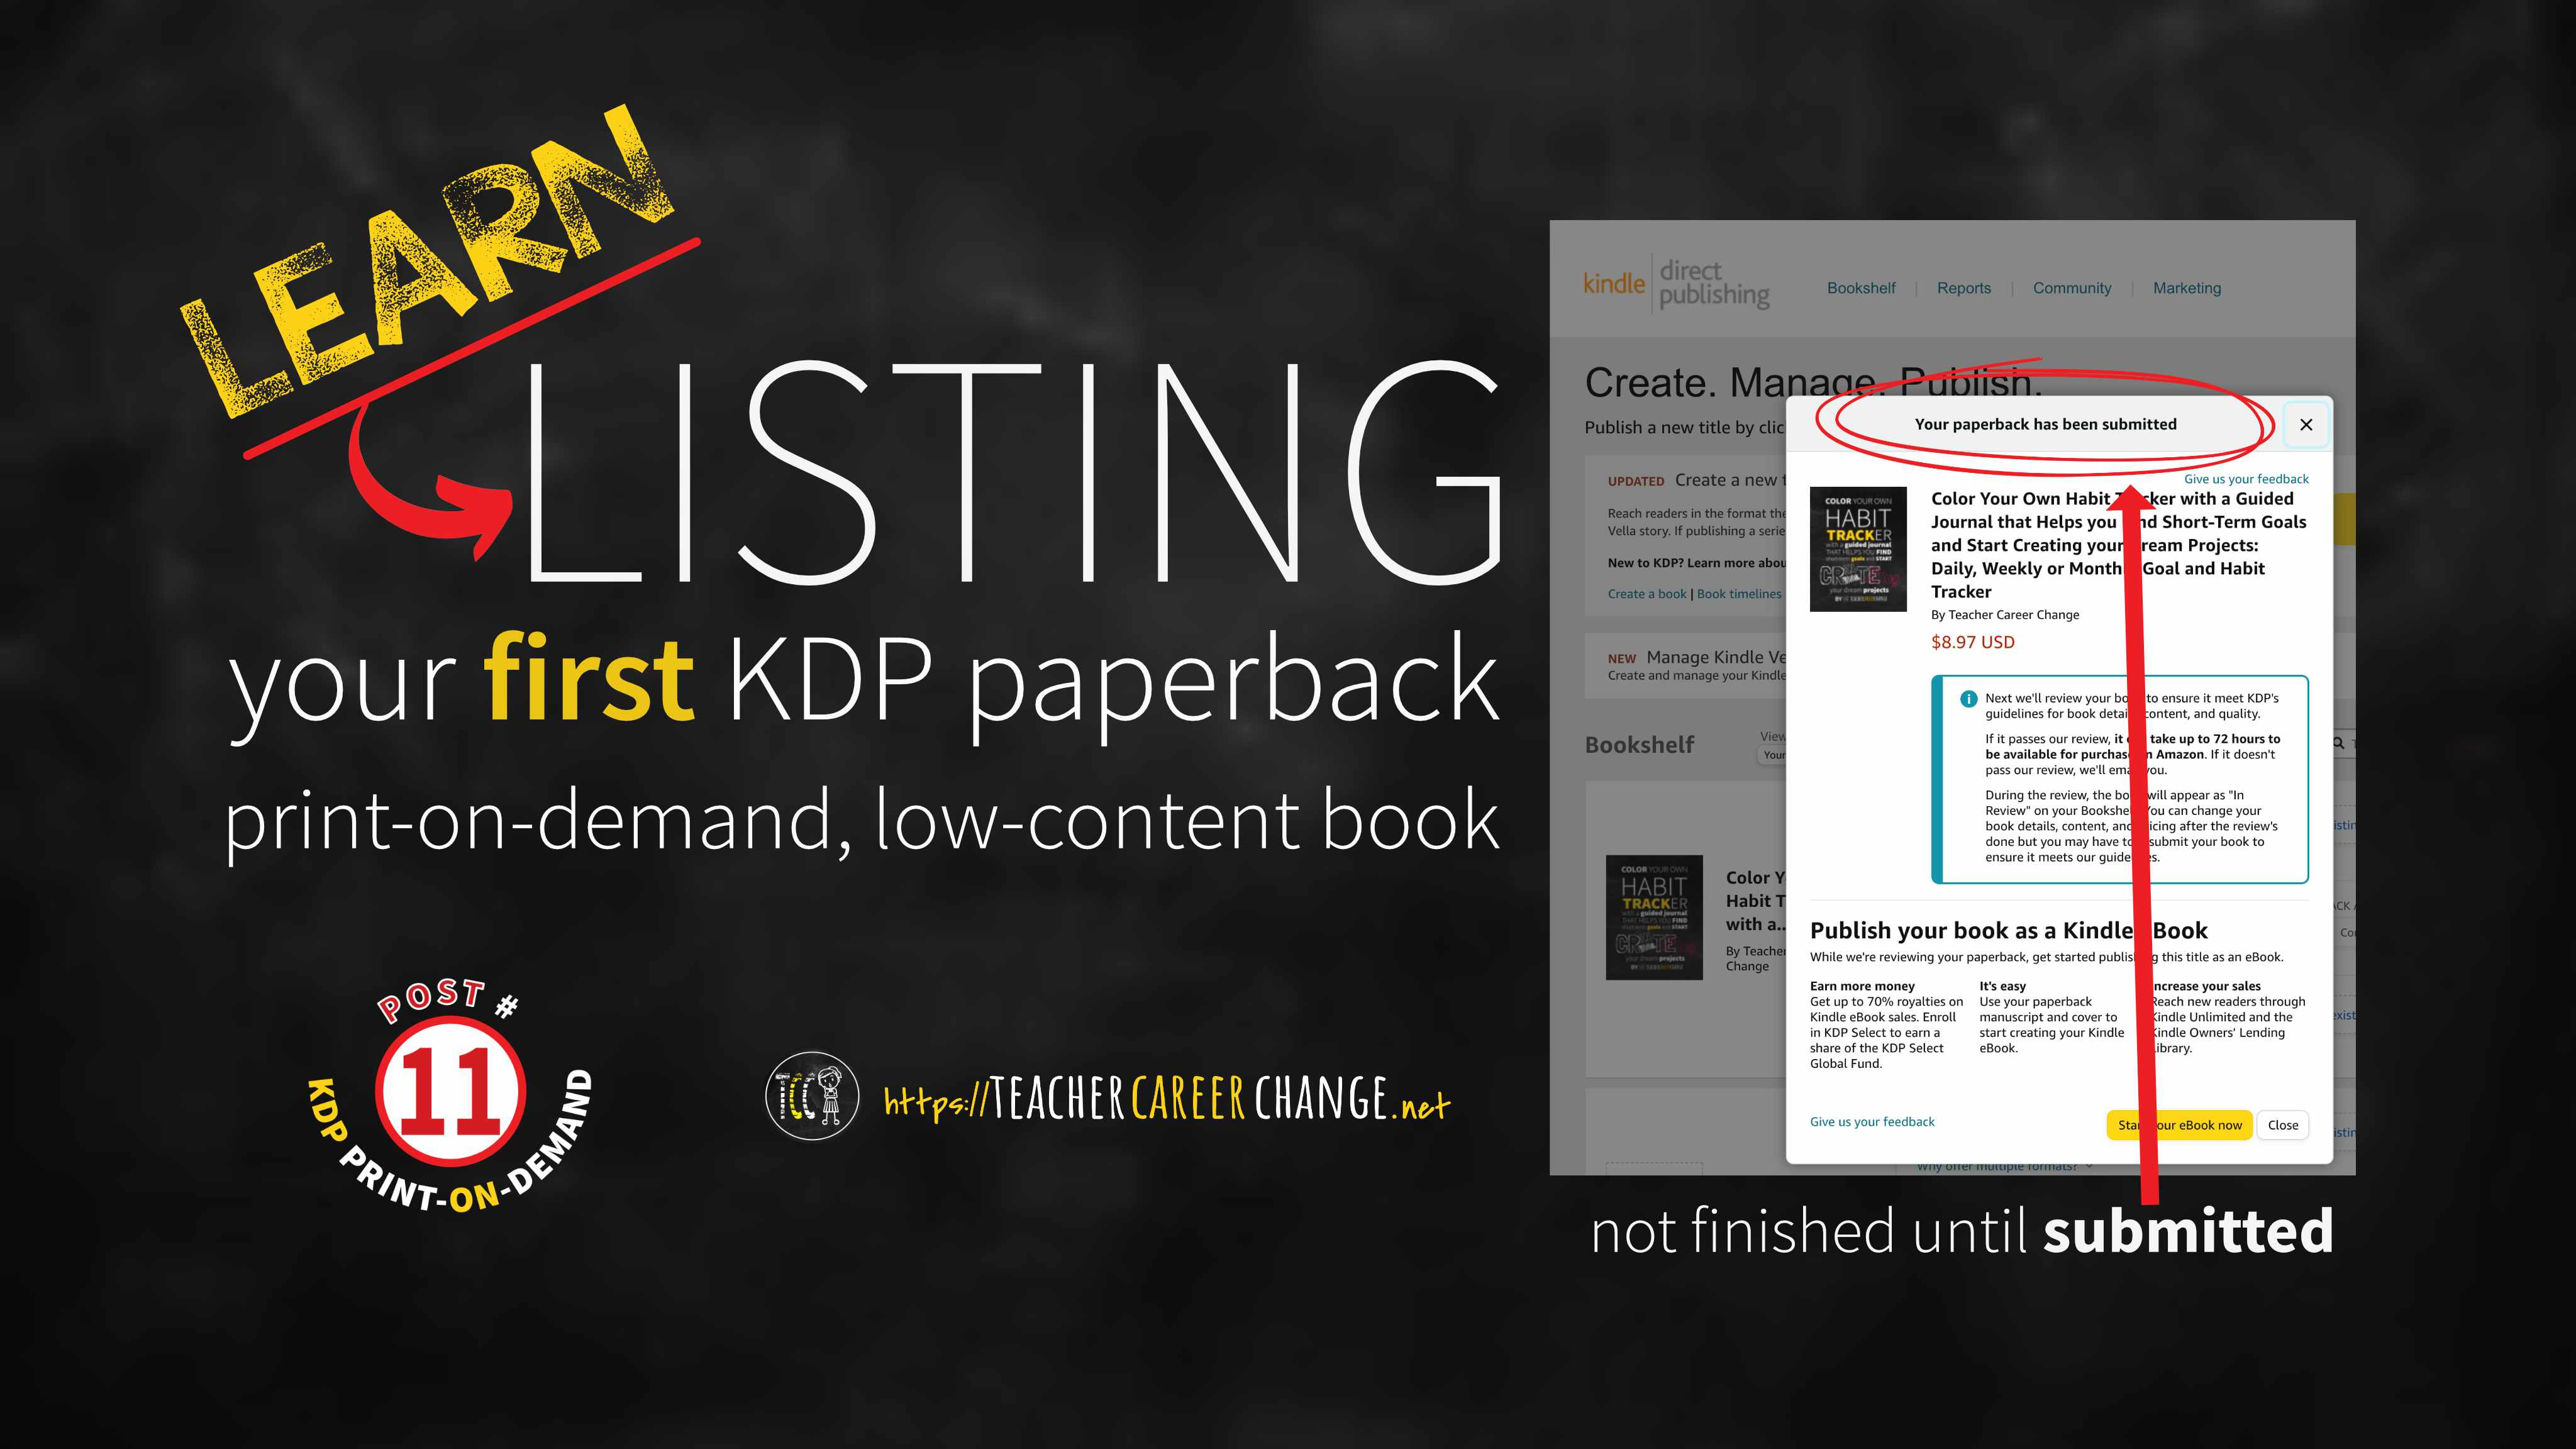
You are not finished listing your print-on-demand book until you see a KDP pop-up screen saying “Your paperback has been submitted” (see the screenshot on the first graphics). How do you reach that in your KDP account? Well you go through three KDP tabs:
Paperback Details [text]- where you put the book title, author, description, keywords, etc.
Paperback Content [PDF files] - where you upload your PDF interior file and PDF Cover for your low-content book
Paperback Rights and Pricing
See the three tabs on the screenshots below. And no, you will NOT see these screenshots after signing-in your KDP account. You see this after you choose what kind of book you want to create. For our purposes, click on “paperback” then you’ll see the three tabs above.
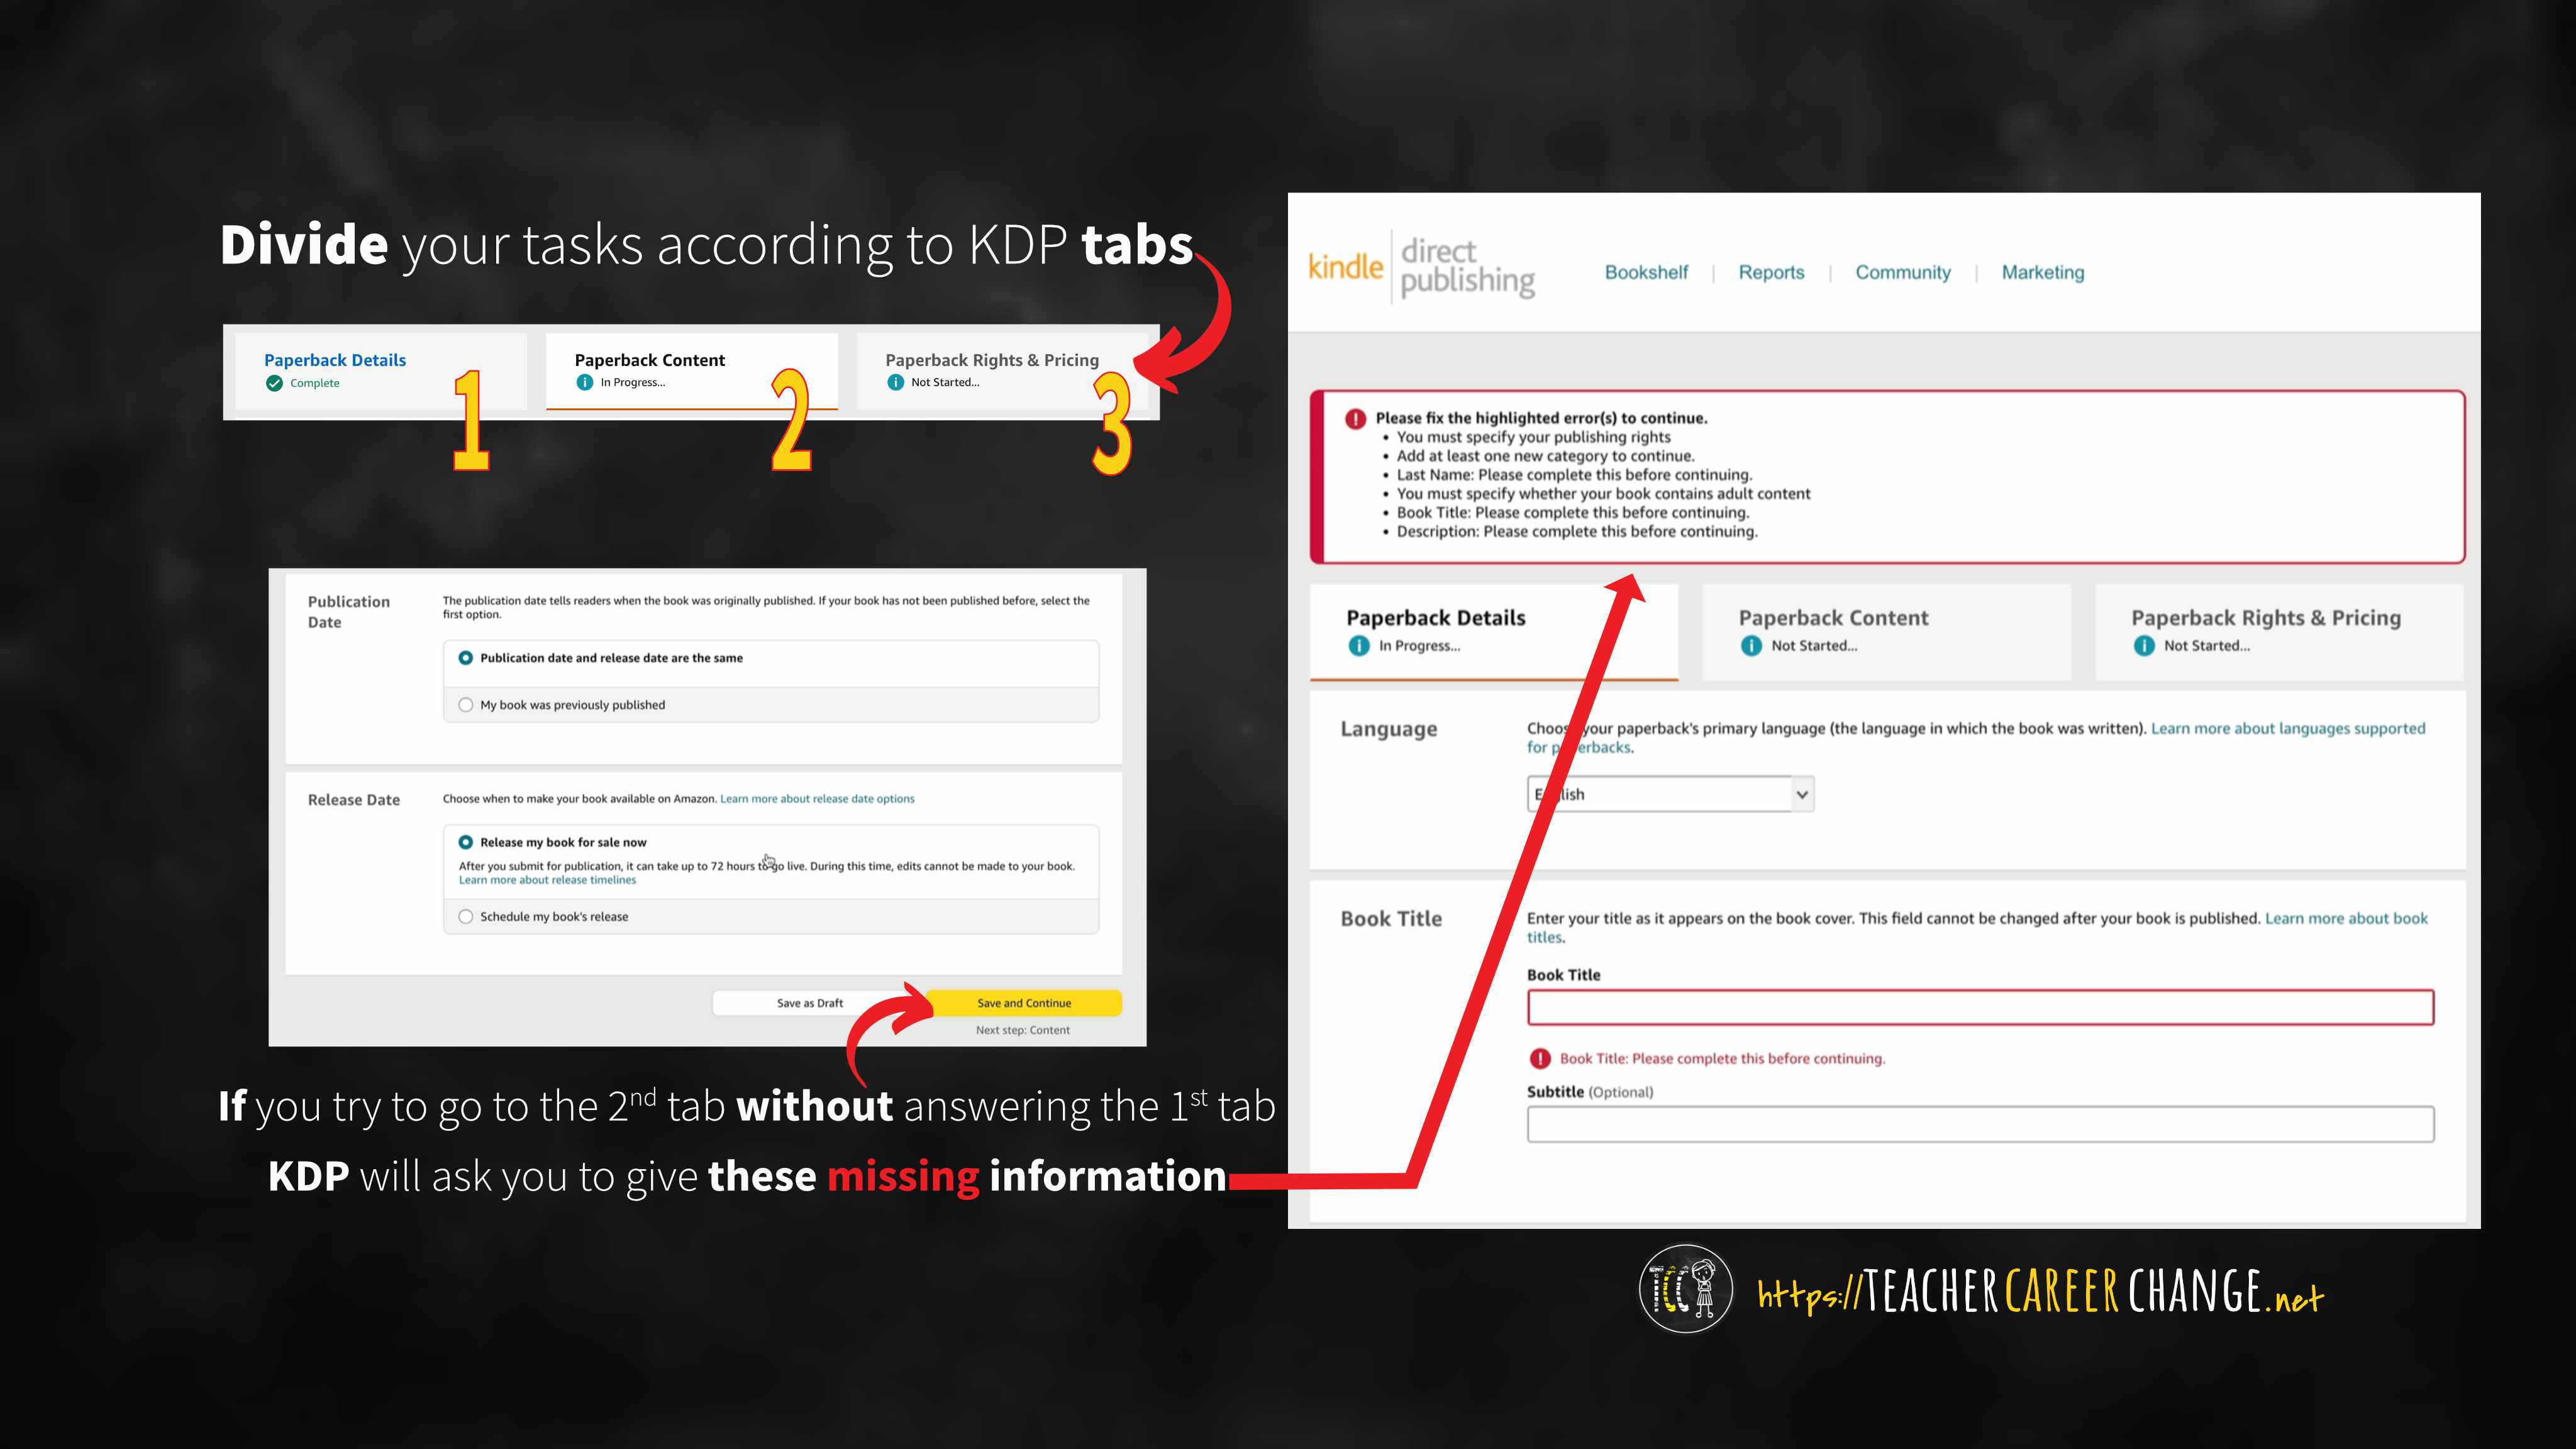
Tab #1 - Text or Practical Answers
You cannot go to the next tab until you encode all essential information that KDP wants. To show you, I tried to go to the second tab without entering any text; it gave me the information the first tab needs before allowing any user to go forward:
your publishing rights - if you own the copyright (you created it) or if it is public domain
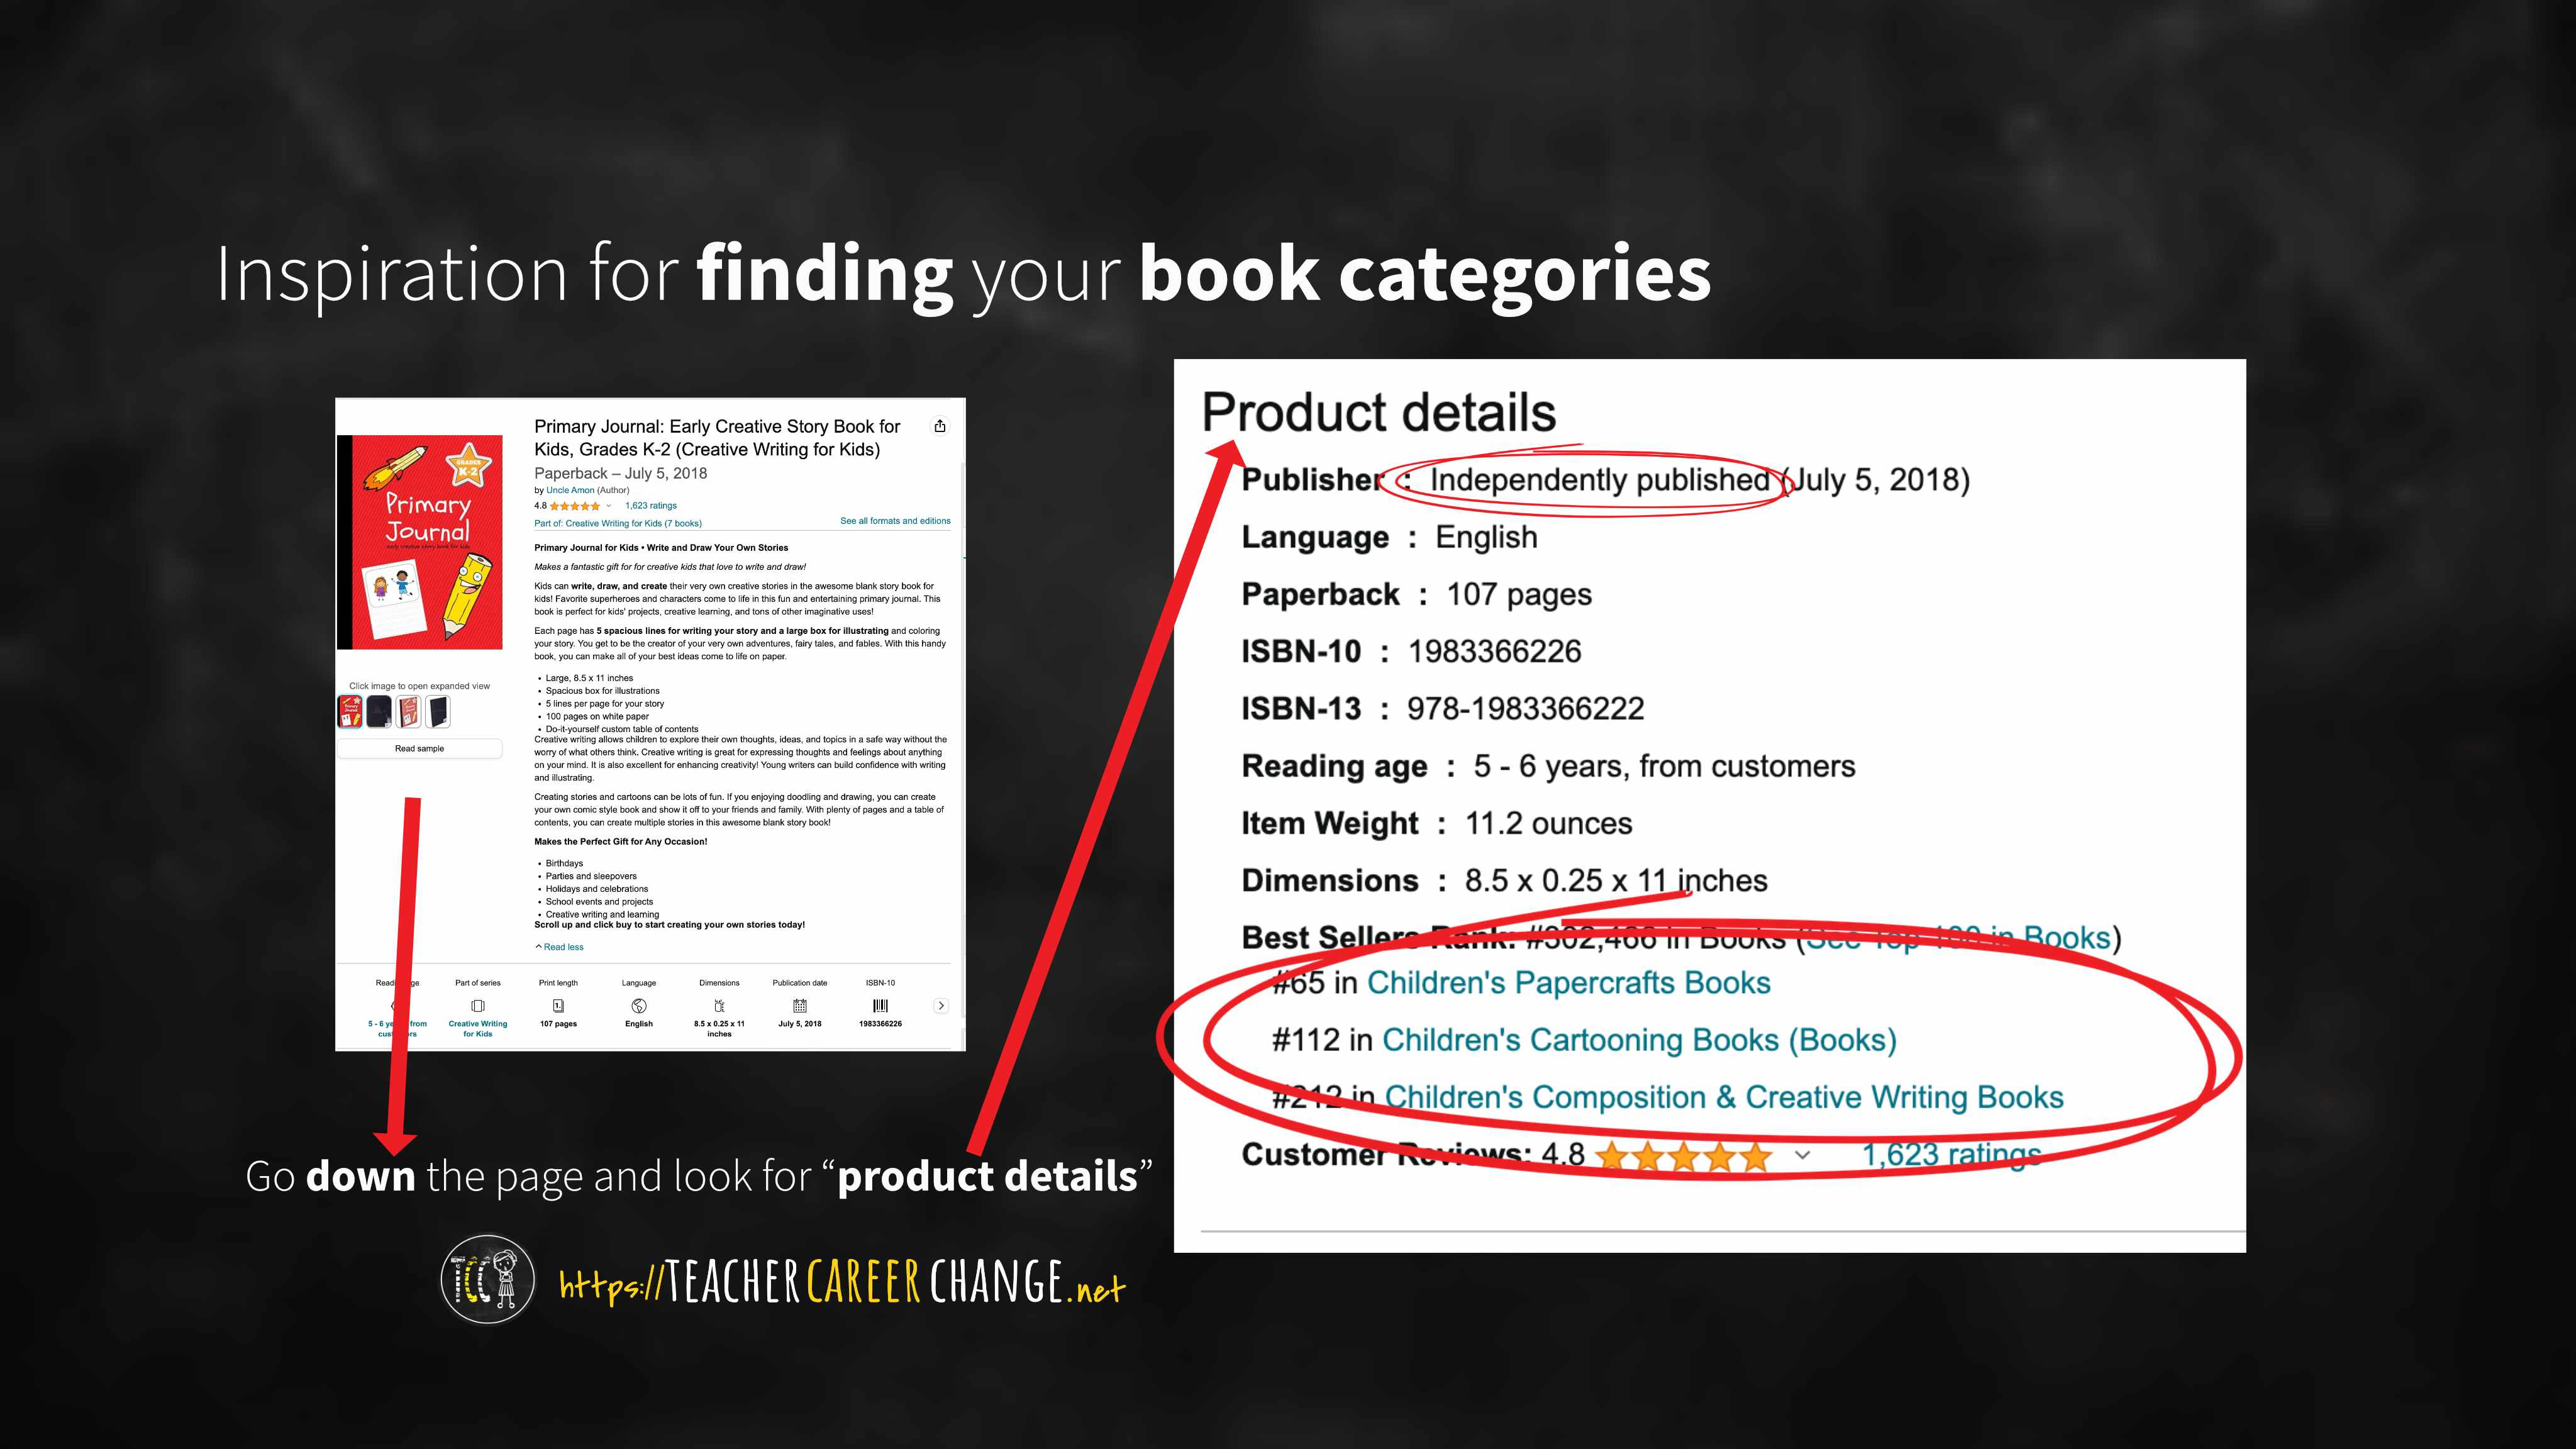
choose a book category - remember the sample product we used to find keywords in a previous post? Well, we can use it to get inspiration on what book categories we can use for our writing journal low-content book. Find it at Amazon (or something similar) then go down the page and look for “product details.” The book categories are the ones circled below. By the way, if it is “independently published” it is probably a print-on-demand book.
last name - the author’s name or brand name of your book; note that it only asked for the last name so test the system if you can leave the first name blank.
book title and description - we discussed how to use keywords on these in a previous post
The rest of the questions are easy to answer. However, make sure to fill out the keywords section so that your book will be easier to find.
Tab #2 - PDF Files and Print Options
Aside from choosing your print options, the second tab is where you upload the following files:
the “manuscript” or inside pages PDF file; just in case you need a recap, please review:
the book cover - please review how we created our first cover on this post
Caution: Overcoming Preview Mishaps
It is on Tab # 2 where a lot of first timers get frustrated. Why? Because KDP will ask you to preview and approve it before going to the next tab. The simplest way to prevent frustration is to create from templates as I repeatedly said in this series. Use a KDP Book Cover Calculator before creating your cover. Use manuscript or inside pages templates before creating your first design. If there are still issues, breathe and do it again. It might be a margin error. Just move the design. You’ll learn as you do it.
Tab #3 - Pricing
The last tab is the easiest to answer: pricing. If I were you, I will just put an initial price and order your author copies (after it is published) to celebrate your first book. You can go back and change the price afterwards. The important thing is to learn the process and begin your passive income stream. Once you experience earning your first dollar, it is up to you to learn and sow more to multiply your passive income harvest. We’ll discuss the use of Artificial Intelligence in KDP in the next post then how to increase the number of print-on-demand books to generate more income. Subscribe so you’ll not miss a post.