
How to Create your First KDP Cover for your Amazon Low-Content Book
Three Keys to Move Forward and not be Stuck (Post #10 POD)

Creating your first Kindle book cover for self-publication might get you stuck, especially when you tend to be a perfectionist. I was a perfectionist before. Result? I got stuck and my projects do not move forward unless I have a deadline. Well, when you want to build passive income, you have to move forward and just do it. You have to start. In this post, I will share three keys to help you move forward and create your first low-content book cover.
This is the 10th of 14 posts about creating low content books to start a passive income stream for teachers and other career changers.
Key #1 - Use Templates
Start with a template with the right size, margins and book spine. Many first time cover designers get frustrated when Kindle Direct Publishing (KDP) reject their covers because of sizing and margin issues. Remember, you are creating a print-on-demand book. That means, Amazon KDP will print your book according to pre-set standards. Use the KDP Print Cover Calculator to generate a free template for your book.
Key # 2 - Use Your Keywords
In a previous post, I asked you to find target keywords. Use those now to create your book title and cover concept. Don’t overthink it. If your keyword is “writing practice for kids PreK” make a simple title from that phrase then create a cover concept. Remember, you are not entering an art contest. You are learning how to create a cover that will attract your target buyer. Offhand, here are my ideas from our sample target keyword:
writing lines with a pencil
emphasis on the word “writing practice” - bigger, bolder; the rest of the title are smaller
“PreK” prominent on the upper right portion of the cover
Designing is simply guiding the reader’s eyes to convey a message. We use text sizes, color and images to emphasize the message we want to convey: buy this writing practice paperback. Don’t overwhelm their eyes by cluttering the cover.
Key # 3 - Start and Use What You Have
The most important key is to start and use what you have. Don’t focus on what you don’t have (skill, apps, hardware). If you know how to browse, click and type text, you can learn how to do a print-on-demand LCB cover. Here is how to start. Log-in your KDP account and click create paperback. You’ll see 3 tabs on the top. Answer the questions on the 1st tab (you can go back and change it) so you can go to the 2nd tab. See the picture below for details.
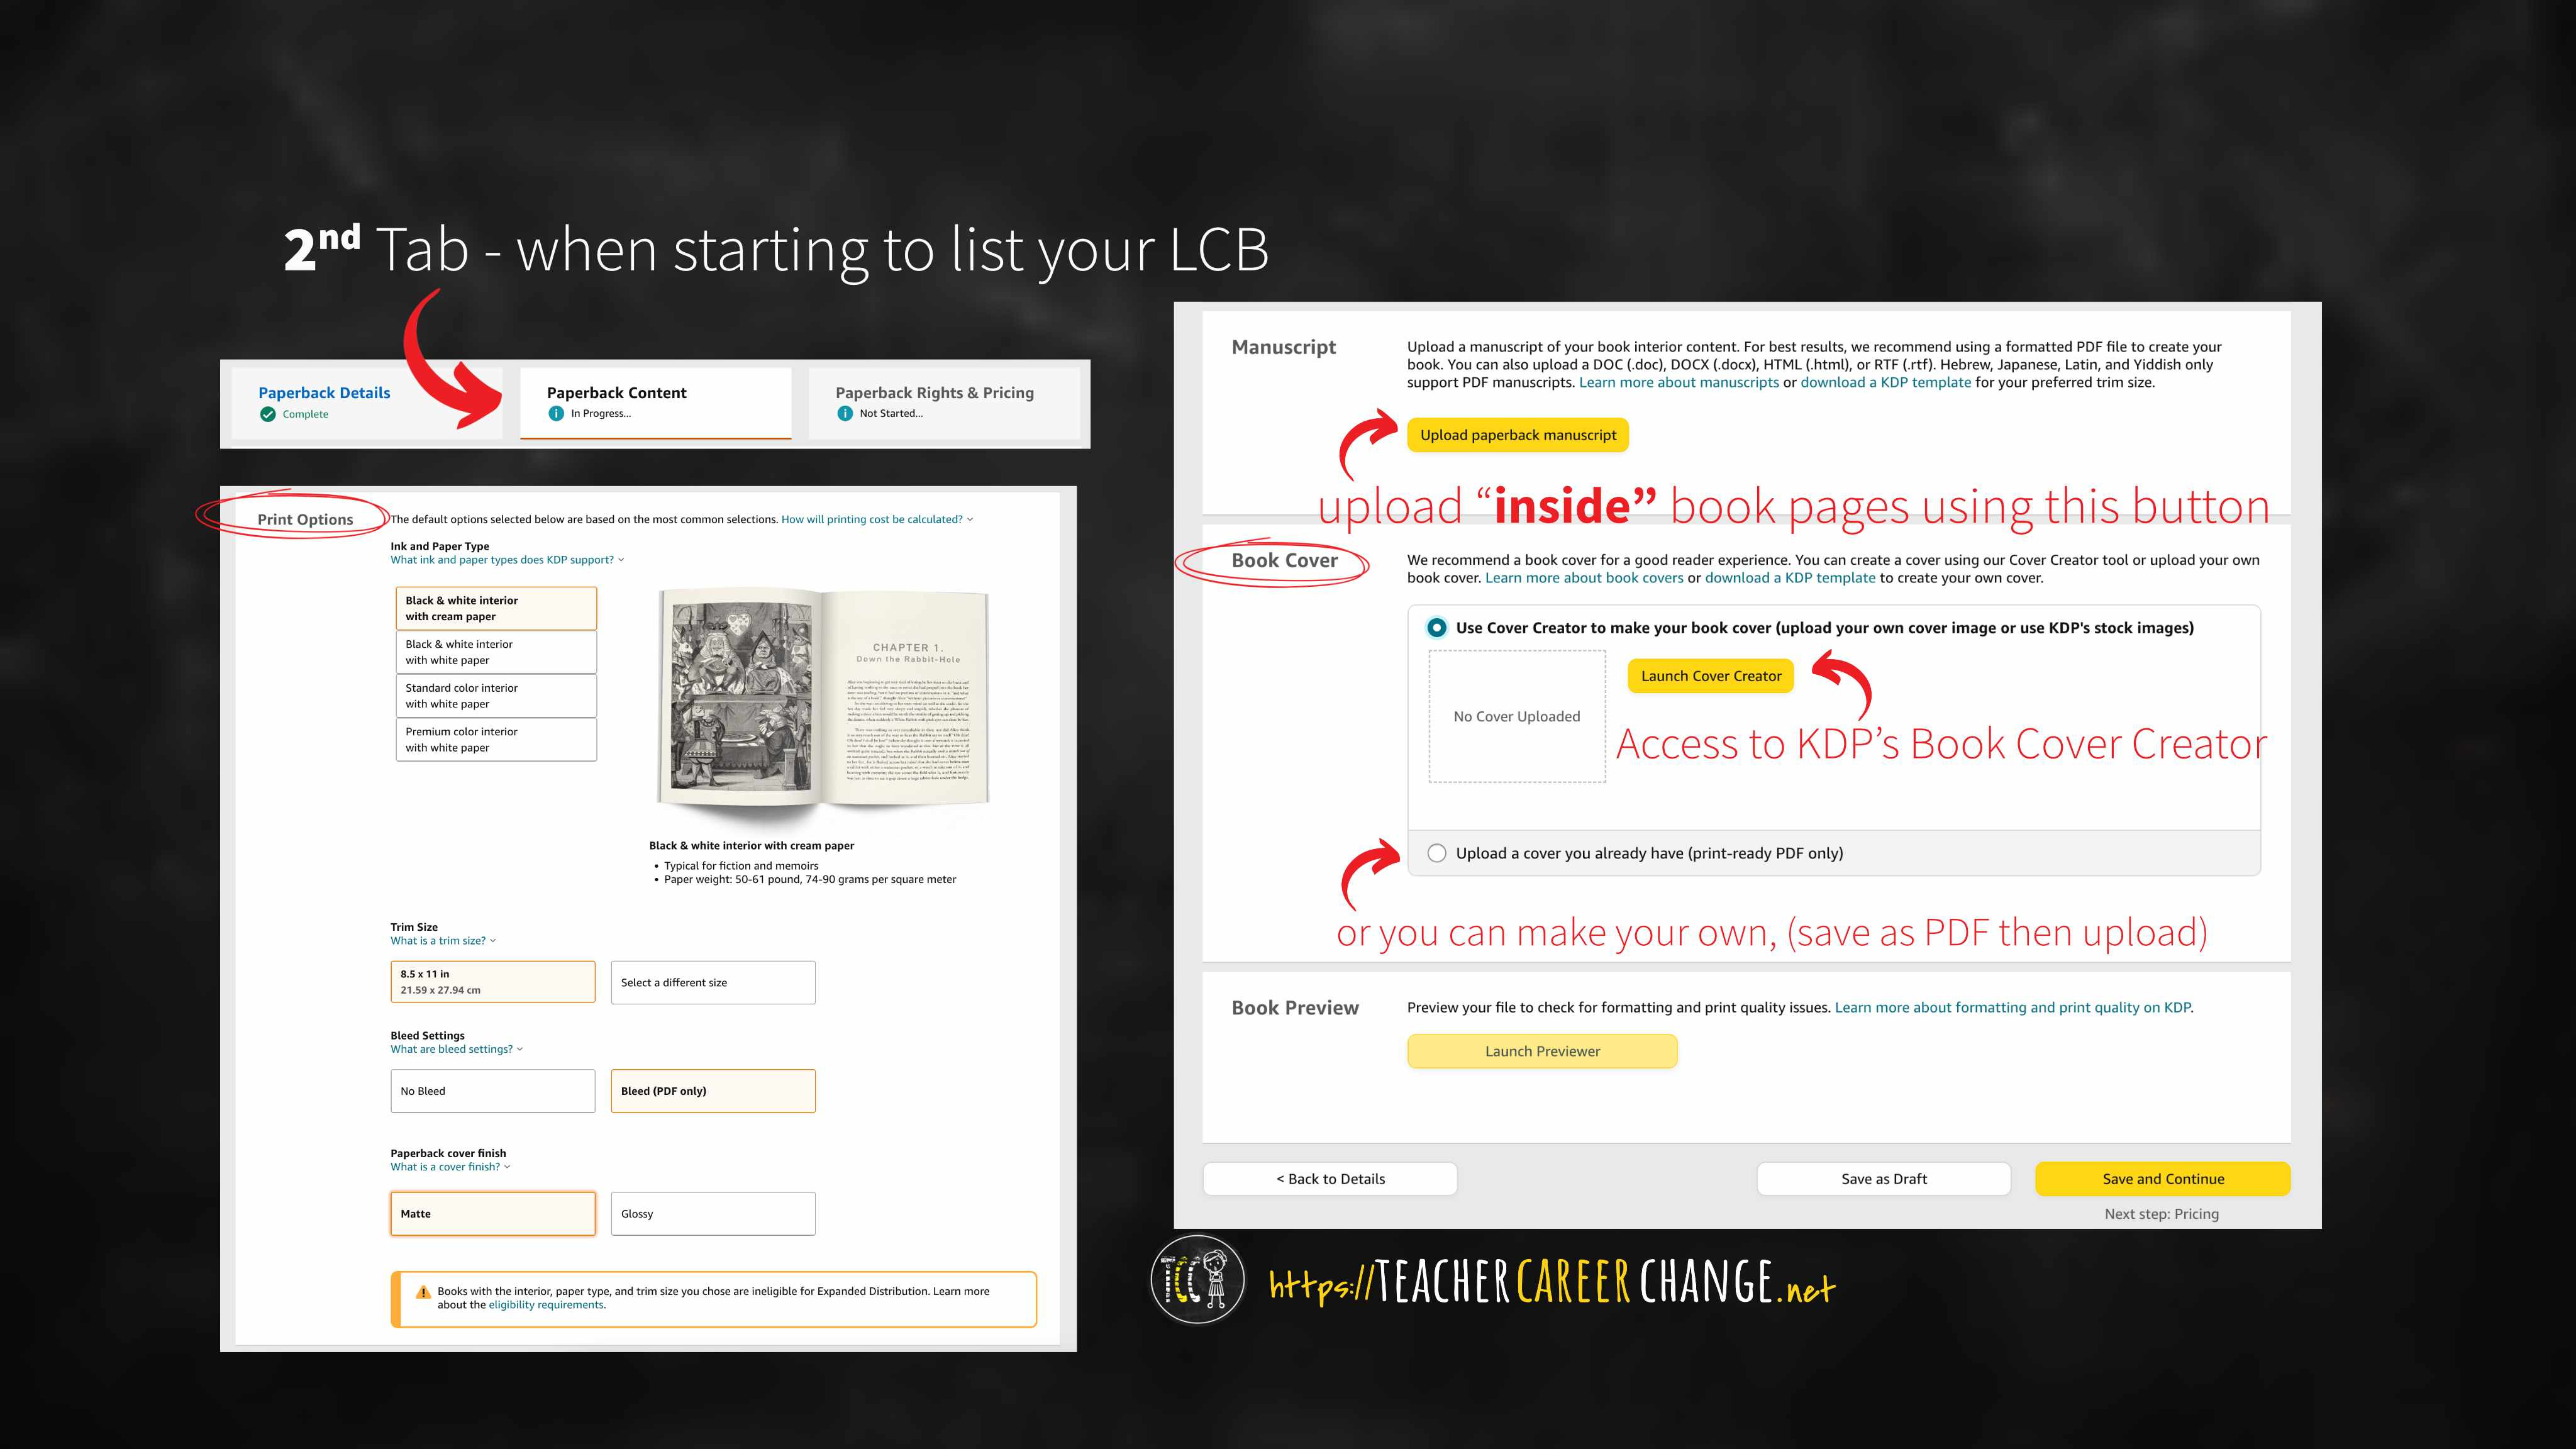
After you find the “print options” you’ll see the different book dimensions and paper setting. I chose the biggest one which is as big as an ordinary bond paper. The “interior” pages are the writing lines PDF we generated in the previous post. Underneath is the “book cover” portion. You can create your own or use KDP’s Cover Creator. KDP already published a detailed instruction with pictures and video, so just click on that link. I can give you other ways to generate a cover, but I do not want to overwhelm you. I just want you to start your self-publication journey and move on to your next low-content book upload. Why? Because the more books you “sow,” the better your passive income “harvest” you’ll get. In the next posts we will learn:
how to list your first KDP print-on-demand paperback “notebook” on Amazon
if we can use AI Tools when creating and listing KDP books for self-publication
how to find and decide what to publish next to increase your LCB passive income
recap the steps to self-publish low-content books at Amazon KDP